Sunday, November 27, 2011

Albion Dynamo Ocular View Shields

I have finally listed a pair of my steampunk goggles on ebay for sale and to say that I'm nervous would really not cover things very well.  If you follow the link you can check it out for yourself.

http://www.ebay.com/itm/290638747258?ssPageName=STRK:MESELX:IT&_trksid=p3984.m1586.l2649

I tried to use a similar style to the ones I made for James for the Ren Fest and added another copper coil to the other side.  Hopefully these will do well and hopefully they are packaged good enough not to be damaged during shipping and hopefully the customer will like them and hopefully...  But you get the idea.


Wednesday, November 16, 2011

Carolina Renaissance Festival

We made it to the Renaissance Festival early on Sunday morning and I have to say that it was a lot of fun.  We met several friends and a lot of people that were really interested in asking about our steampunk stuff.  This is Lauren who sported one of my cup style goggles.  This was the more classical look, I think, with the loupes, faux locks and added parts that looked like an older more victorian style.


This is the outfit that I wore including the Excelsior Goggles and my steampunk side arm which I will detail more a little later on.  (BTW, I think that may have been John Kerry in the background but I never talked to him so I cannot confirm this one way or another.)


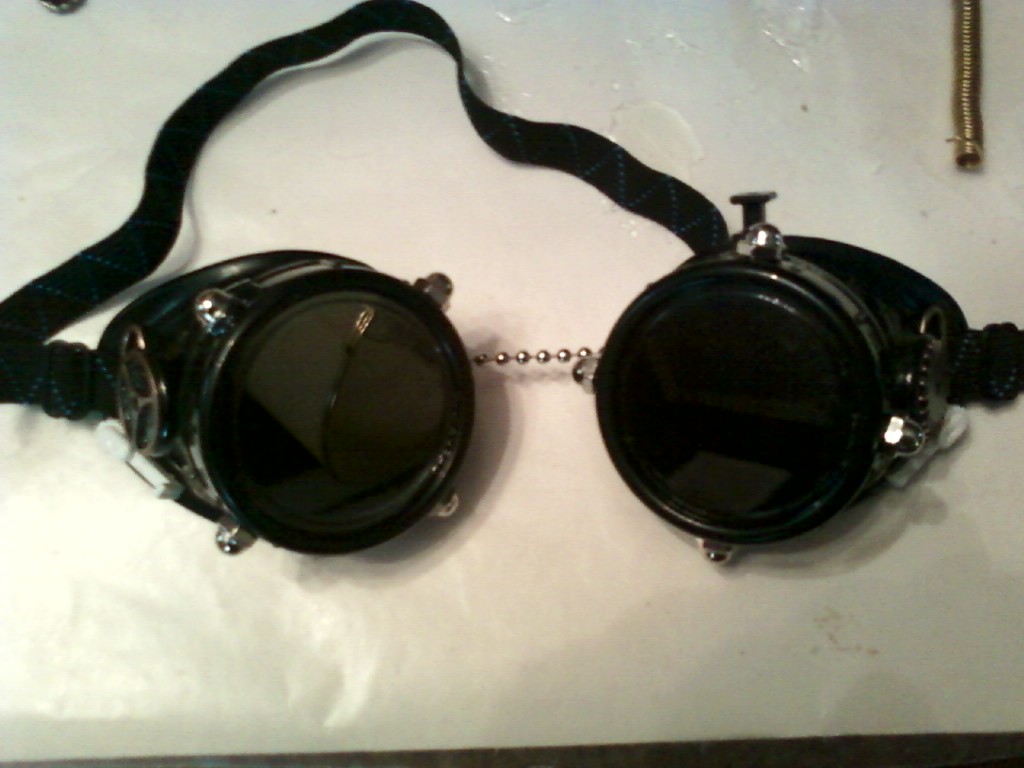
My outfit turned out a little more western than I had originally envisioned but all the responses to my goggles and steampunk gun were really positive so I can't feel bad about it.  I have really focused more on the gadgets than on the clothing so I can modify the rest later on.


This is a pic of myself and a lady that we met who makes her own costumes, Peggy.  She was really nice about encouraging us both to go after out dreams of making costumes/steampunk stuff and she related that she has been successful in these areas herself.  She made her entire costume, including the hat, in about a week so I can only be in awe of that level of talent.


This young lady was wearing handmade steampunk wings which were just too cool not include on this post.  Very interesting stuff.


The entire day was a lot of fun and I feel more motivated about continuing with steampunking just about everything that I can get my hands on.

Tuesday, November 15, 2011

Final Cup Style Goggles

So before our day of the Ren Fest arrived I was able to get the two pairs of goggles completed and ready to be worn around in public.  The first pair are the ones I gave to Lauren and I had tried to go for a slightly more classical approach (locks on the sides, a raised almost triangular attachment just above the side vents and plus the two almost flower like raised pieces below the vents.)  I wanted to put some keys on here too but time constraints and all that.  Plus the keys I had ended up just being too big to add the way that I had originally planned.  I did like the post that I added specifically to be able to give the loupes somewhere to grip on these.


The next set are the goggles that I made for James and these had a much more mechanical feel because I added the numbers dial on one of the vents so that it could still be turned as if you were adjusting some setting on the goggles and I put a copper coil just below one of the vents.  There is also a wire screwed in to the other side and the wire actually goes around into the inside of the goggles.  I also really like the big key that I added to the top and got a lot of compliments on this at the festival the next day.


Both goggles have some new ideas piloted on them for the first time like the thin beading wire around the nose piece and the "targeting" lenses.  These were done with a glow in the dark spray paint so you can enjoy a different feature of the goggles at night.  I also did more of drilling small holes to pass things through to attatch more securely.  This included the large key on James' goggles and the copper wiring.  Hope everyone likes these and I can't wait to get started on more projects.

Monday, November 14, 2011

The Rush to Get Ready for the Event

I asked my friends if their daughter, Lauren, would be interested in a pair of her own steampunk goggles a few days ago.  She had made her own halloween costume out of some everyday stuff and the pictures of it were really impressive.  I was quickly told that she would really love to have her own pair of goggles so I started the hunt to find some of the cup style goggles to work on.

I thought it would be easier to finish these quickly since they would be smaller canvases than the one that I had created for myself.  Finding them at a store ended up being quite a feat in itself though.  I finally ordered two pair from a seller on eBay but I did eventually find out that one of the local Ace Hardware stores carries this style of goggle. 


My partner had ended up mentioning during this part of the process that he would like to have a set of steampunk goggles of his own thus the reason I ordered two goggles to work on before the Renaissance Festival. 

Here is what the work space started to look like.   


I epoxied on wing nuts on one set of goggles then acorn nuts onto the other one.  I tried a few different things this time around too like trying to glue most of the stuff on first then painting later. 


These pictures mostly show the goggles I did for Lauren because I ended up being in sucha hurry on the last day before the festival that i didn't take as many picture of the other pair as I would have liked.  The views here show the stuff I glued onto the side vents which could already turn on a center axis so it gives a little more potential motion to the gears.

 The only thing I'm not thrilled about are the elastic bands thatcame with the goggles.  They do the job of keeping the goggles in place but I would have preferred using leather straps again on these.


Thursday, November 10, 2011

Excelsior Aviator Ocular Shields

These are the pictures of my steampunk goggles with all of the painting done and cool stuff glued on.  I'm calling them the Excelsior goggles because they were "the great experiment."  I will probably still list them as being a WIP just because there are still some things with the lenses that I may try later on but for now I like the targeting assembly I made and I have to say that overall I am really happy with the way they turned out.  Next stop, the Charlotte Renaissance Festival.  Comment if you like them.

Tuesday, November 8, 2011

Steps in Goggle Creation

Here is a breakdown of most of the major steps that it took to get my goggles completed.  I have put the pictures that I had on file to try to help with the visualization of the process.
The original goggles as they were when I purchased them from a local flea market.  Here I had removed the elastic strap and had to do some repair work using 5 minute epoxy to the round vents as they had a few breaks in them.   Next, I painted the base coat of Krylon Fusion black paint so any other paint would have a way to stick. I now believe that glueing on most of the components first would have been better since the flexible area became very sticky and attracted a lot of hair.  I glued several wing nuts and acorn nuts around the flip up lense assembly to make things a little more mechanical.  Then the radio tubes with their custom plugs were added along with gears on the side and an assembly from the car instrument panel with a bubble level added for effect.  The magnifying loupes have their own clip to attach them but also alows them to be removed at any time.  These were actually saved until the end along with some other items.  Finally you can see what I wanted to do with this project start to come into focus.  I only needed to add the rub n buff color, work a bit on the lenses and then cover everything in clear coat to preserve the painted details.

Thursday, November 3, 2011

Realist Weight

My friend, Paula, brought up an interesting point when I was talking to her about steampunking the plastic dart gun that I have.  She wanted to know what I was going to do to make the gun feel more realistic.  It was a good question which I had not really considered.  After all, even with some paint and a few extra items glued on here and there there would still be a fake sort of lightness to it when you wielded it.  Thus my next find was going inside the gun to make it feel a little heavier.  I went to the Harbor Freight and bought a pack of wheel weights.

These weights have their own self adhesive backing that I tried to use to adhere them to the inside of the gun halves but eventually I ended up having to use the 5 minute epoxy to secure them.  Enough of the 1/4 oz bits of metal and you start to get a real heft to the gun.  I also had to be careful not to block any internal moving parts that I still wanted to work like the trigger.  The next pic shows the first set of weights that I put in the gun but I did add some more later.

Wednesday, November 2, 2011

Dials for Gun Settings

I recently found out that there is a huge collection of random spare parts that might serve to provide the next essential pieces of my steampunk artwork.  One of the local junk yards, specifically Pull-A-Part here in Charlotte, turned out to be a great place to discover raw materials for conversion.

The sheer number of different cars, trucks and various other vehicles opened up all sorts of possibilites as what I might find that I could use.  Of course, you have to pay a small fee just to get in to look through the derelict transports and then once you find what you want you have to pay for the individual items themselves.  So I tried to focus on things that I could tell were broken or just really small because intact larger car parts might cost more than you really want to pay just to take it home and destroy it for art.  This is how I found the horn assembly that I wrote about before that got treated to a good coat of rub n buff.  I also got an old dash instrument cluster which included the speedometer, tachometer and a few other things that I thought might look good once disassembled.  In fact, the numbers that you normally see scrolling to show how far your car has traveled turned out to be very cool looking on their own.

They very much appeared to be like dials that you could use adjust the seetings on something so I used one of these for my gun.  I picked a spot on the housing of the gun and drilled a very small hole through to the inside.  Plastic is pretty easy to drill so this didn't take very much effort.  Then I bought a tiny screw with matching self locking nut from the hardware store and just put the screw through the middle of my new dial then put the nut on the inside to hold it in place.  The dial still turns and gives the impression that you can adjust a setting on the gun before firing.

I think the effect turned out really well and the dial isn't going anywhere since the locking nut will hold it in place. 

Tuesday, November 1, 2011

Vacuum Tube Connections

I realized pretty early on that I would need a way to add my vacuum tubes to my steampunk projects that included something more than just glue.  I decided that the best thing to do would be to make my own plugs for these to insert into.  I went with a type of jewellery clay called Pardo by Viva Decor.  This comes in packs of small round pieces of clay that can be worked into the proper shape then baked to a hard finished substance.


I found what I needed at the local craft store and bought a metallic copper color just in case I decided not to paint the connectors black.  When working these lumps of clay you really have to add quite a bit of water to help them soften up and then just keep kneeding and rolling until you end up with a very soft, pliable version of the original.  I ended up taking a lot more time to do this on my second attempt but the main goal is to make sure that the clay will shape easily when you are ready to try out the vacuum tubes.  I finally ended up with a somewhat barrell shaped piece of clay that I "plugged" the tube down into and then removed so that I had the impression of the metal wires from the bottom of the tube.  I then placed this in the oven for about twenty minutes or so and after it had cooled I was left with a connection for my radio tube. 


Now I was able to plug and unplug the vacuum tube which fit pretty securely into the connector and I could then use some five minute epoxy to glue this onto my steampunk item.  I could also remove the tube anytime I needed for storage or other purposes.

Wednesday, October 26, 2011

The Ugly Truth About Conducting Coils

I have found out the hard way that there can be way too much tension created by conductor coils.  I made two different sized coils out of beading wire and attached them to various parts on my goggles.  Later I found that these had twisted around enough to break off at least one of the parts they had been attatched to.  I still like the idea of using these on some of my projects but I think it may be best to add them onto things that are either an original permanent part or to find a better way of securing the ends.  Sorry for the screw up but I guess that is what all of this experimentation is all about.

Tuesday, October 25, 2011

Guns Don't Kill

While making your preparations to go out into the steampunk world I would like for you all to keep in mind some words of wisdom from a friend of mine:


Sage advice I think.

Sunday, October 16, 2011

Rub-N-Buff Finish

I have read different articles on line about the AMACO brand of Rub-N-Buff finish that can be used to give your experimental sculptures and projects a weathered, metallic look. Although the product was ostensibly created for use on picture frames to lend an old metallic feel this stuff works really, really well on making basically anything look like tarnished metal. It is primarily a wax metallic paste that carries tiny particles of soluble copper and other metals.


This is to be applied either with your finger tip, a cloth or a stiff bristled brush.  The warning on the package says to use small amounts as they dry quickly.  I decided to experiment on something other they either of my main projects first so that I could get used to this new medium that I have never worked with before.  I chose one of the things that I found at one of the local junkyards in an old car, an after market horn assembly.  I removed the large, internal magnet, circuit board and the few other things inside and cleaned the housing really well before getting started. 


Once I broke the seal on the rub-n-buff I got started with a little on my index finger and started painting the back half of the housing.  The warning on the instructions about the stuff drying so quickly does not do justice to how fast this stuff will no longer spread.  I would almost classify it more closely to drying almost instantly.  I also could not resist the urge to really "paint" the plastic surface probably because I am so used to working with canvas rather than plastic.  It turned out to be best to make short quick strokes on the housing and to put larger amounts around the more raised details.  The key way to imagine what you want to accomplish with this is to look at the black base color as the tarnish and everywhere you touch with the rub-n-buff is where the "metal" is cleaner and showing through.


One technique that I was able to bring over from past painting experience is that you should choose a brush stroke to work with as you apply the metallic paste.  When I first started on the back half of the plastic housing I was using a more circular pattern but as I moved around the sides and then on to the front half I realized that I liked it better when I just more dashed on strokes in a single direction.  Plus, it will really help to either paint multiple sections of one item together so the patterns match.  I ended up holding the two sections together at the last and bringing a few lines across both to make sure they looked like they aged together.


Later, when all of this has dried, I will go ahead and coat the housing with my Krylon clear sealant as to make all the new coloration permanent.

Thursday, October 13, 2011

Home Made Conductor Coils

One of the things that may be missing from your steampunk project is a healthy set of highly conductive electric coils.  These would be handy for carrying large amounts of power from the radiant matter accelerator cells over to the parabolic aether wave form nets on your hand held powered weapon.  To that end, you can create your very own coils simply and to your own specific lengths.  Just buy some basic metal beading wire which can be found at a craft store in the jewelery section.  This wire is general designed for making various forms of jewelery such as necklaces but it's tensile strength and flexibility are perfect for electronic parts. 


The wire can be wrapped around a small round form which will help to give it the desired coil shape and can then be attatched to some component on your project to help give more detail and realism.  I chose a smaller coil so the form I used was the plastic straw out of a spray bottle.


I was able to make a coil about 3 or 4 inches long that fits well over the top of my goggles and helps promote the look of some of the other electrical components I am using.

Saturday, October 8, 2011

Vacuum Tubes-The Wave of the Future

I'll have to confess my love for vacuum tubes right now.  They are one of the most beautiful electronic components that were built for functionalty but also turned out to be individual works of art.  The tiny details inside each one of these radio tubes is both other worldly in appearance and seemingly random.  I will most likely be using these beauties as much as possible on my gear whether they actually have anything to do with steam or not. 

I have noticed along my journey that there are a lot of tendencies for other genres to bump up against steampunk and mix a little.  Including the unusual world of Nikola Tesla.  I think that may have alot to do with vacuum tubes and various other electric parts showing up in steampunk because several of these anachronisms come from much later times than the Victorian Era.

That being said, I met a gentleman at one of the flea markets just outside of town who is a former teacher and perveyor of things of the early electronic age.  He sold me several vacuum/radio tubes very reasonably and so I now have quite a good selection to choose from when putting my gear together.


The fellow wasn't sure which ones still work or not but I have seen individual tubes on eBay that sell for more than I paid for the lot pictured above so I think I will be ok with one or two being burnt.  Actually the burnt ones have an interesting look too because of all the silver blown against the inside of the glass.  Now of course that I have these items which connect to specifically shaped plugs, my task will be to make something for them to plug into.  Still, this process of finding things then making them work is turning out to be quite a lot of fun.

Thursday, October 6, 2011

Time to Get Out the Vote

For the We Love Fine contest for the best steampunk shirt graphic design submitted.  Check it out an vote on all 143 designs.  There is some good stuff in the line up.  The more folks who vote the more the overall prizes increase.  So that's fun.  Click over and take a look.

Steampunk - VOTE NOW on entries!

Wednesday, October 5, 2011

Test Gauge

This is one of the final test faces that I experimented with using some overlays of different patterns to give the image an older look.  I settled on a rusted background as oppossed to some of the other ones I was working with.  I think it lends a good industrial feel to it.  Now I just have to be able to print this out on a small enough scale to fit into the gauge I bought and keep most of the detail.

Thursday, September 29, 2011

Gauge Faces

I found a site a few days ago that talked about printing your very own custom gauge faces for your car or truck's instrument panel.  This would help one to know that whether they were obeying the letter of the traffic law or sticking it to the man by endangering themselves and others they could do it in their very own style.  But this also signaled (get it?) to me that I could custom design my own steampunk gauges for various instrumentation.  You can pick up a pack of printable transparencies at an office supply store that allow you to print on one side and make your own gauges.  The first design I found was this fairly basic speedometer face:


By taking a little time in Photoshop I was able to remove several of the original features of this gauge and start cleaning things up to try to get more into the realm of a general instrument to measure whatever might be needed in supra-Victorian science.


I removed the main indicator hand because presumably when I print this new face out I will place it into a gauge that will have a real arrow to replace the pictured one.  The numbers indicated here are also a little too much like something on a dashboard so I took them out too.

I then copied the small empty box on the left hand side of the original gauge and put another one on the right side.  Then I filled it with a little bit of red to indicate that this would be the dangerous end of the spectrum for our measurements.


Changing the background color of the faceplate allowed me to make this one looks a little less clean than the original pic and I also came up with a name for this instrument.  This aetherometer would obviously be used to monitor the amount of pressure of particulate interaction within the aether itself.  Very useful when manning a personal airship.  I will probably try to also find some sort of gradient pattern to superimpose over the face to try to give a more aged appearance.


Thursday, September 22, 2011

Steampunk Flight Dock

"This is a view of an airship leaving the local flight dock used for all medium sized skycraft in the area. The cityscape was never the same once the flight docks started becoming a regular feature and cropped up everywhere. Personal airships opened up the skies for exploration such as mankind had never seen before and the intrepid adventurers who braved the winds became both heroes and villains. Much like humanity in any other situation."

~

I was able to find a few places around my neighborhood that are very industrial and helped to supply me with the raw photo materials I needed to put this scene together. The different elements were treated to a few filters in Photoshop and then arranged to make the final picture.


Loupes Update

It turns out that I ended up running across a set of jewler's loupes being sold at a local harware store today.  The Harbor Freight carries these as well as other styles of magnifying loupes and the prices are similar to what I paid online.  Just like the silicone for making molds and resin to make gears I can now get loupes for my goggles locally whenever I need them.  This same store also had several items that might work to steampunk a gun like bubble levels and bullseye levels so I think I'll be going back again soon.

Tuesday, September 20, 2011

Steampunk Contest

The good folks at WeLoveFine Shop are putting on a contest to see who can come up with the best piece of steampunk art for them to use on a new t-shirt design.  I just found out about the contest myself today on DeviantArt and it is only open until October 3rd.  But the grand prize is $2000 so that seems like pretty good motivation to try to come up with something.  Click over and check it out.

https://www.welovefine.com/contest.php?id_contest=3

P.S.:  Thanks for the 100 views on my blog.

Monday, September 19, 2011

Power of the Loupes

The eBay gods have seen fit to smile upon my project by bringing me one of the essential items needed to make a really nice set of aviator goggles.  I found a pair of clip-on magnifying double loupes to add to my goggles and they were incredibly reasonably priced.  The loupes arrived today so I had to share a picture of what they look like.  These are normally used by jewlers or anyone doing very fine work that might be hard to see otherwise.  The two lenses have different magnification values and so you use them individually or combined to see things really close up.  The clip built onto the back of the extension makes it easy to add to my goggles plus I could move them around and not have them be permanently in any one spot.  I'm so excited to have gotten these through the mail because I haven't seen them for sale anywhere around here.  Of course, I have been through that before too.  Check out the pic and see what you think.